

After building this blog on WordPress.com for four wonderful years, I made the decision to migrate this WordPress.com blog to self-hosting a month before my blog’s fifth birthday. The transition to self-hosting was a move I contemplated making for several months but avoided due to how convoluted and potentially costly the migration process seemed. Interestingly enough, as my “free” wordpress.com blog became more complex, it started to incur self-inflicted costs that mostly eliminated any advantages of using a free blogging platform, to begin with, hence I made the decision to switch.
What is the difference between WordPress.com and WordPress.org?
I will begin this guide by discussing the differences between wordpress.com and wordpress.org. If you are already familiar with this distinction, please feel free to proceed to the next section.
WordPress.com is a free blogging platform. Anyone can sign up to create an account and start blogging right away. However, as you might expect from a free platform, you are forced to work around technical limitations. For example, your URL will include “xyz.wordpress.com” at the end. With that being said, the branded domain is free and so is the hosting. If you do not know, hosting is essentially the storage space where your website’s files are stored and accessed whenever needed. WordPress.com allows you to map a custom domain and upgrade to additional storage space for an added fee.
On WordPress.org, you install and control everything. You can purchase your own domain name, you can buy any WordPress theme you like, the blog is yours to customize and create. It is up to you to keep your content optimized, backed up, and secure. You manage both the front end and the back end of your blog. This can get a bit complicated at times and some technical knowledge may be needed but, the WordPress interface is generally easy to use and plug-ins open doors to endless functionality on your site.
Which is better?
I recommend new bloggers start with wordpress.com. First, get a taste for blogging and see how you like it before you ever pay a penny. Use the free platform as a way to become familiar with the WordPress interface (it doesn’t change much between the free and self-hosted version.) Then, whenever you and your blog are ready, follow this guide and migrate to WordPress.org. You’ll have full control over your blog’s appearance, plug-ins, advertising, and more.
5 Reasons to Consider Migrating Your Blog
If you’re anything like me, you may have a few concerns about migrating away from WordPress.com after blogging there for so long. Hopefully, this section will help mitigate your fears and convince you that the migration is worth it.
- When you blog on WordPress.com, no matter how much time and effort you invest in your blog, the asset never actually belongs to you. It remains the property of WordPress.com and can theoretically be closed/taken away at any point. Blog under your own guidelines.
- Your WordPress.com followers and e-mail subscribers will transfer after the switch. You don’t have to worry about losing the audience you have built.
- Hosting at WordPress.com is snappy and quick but even a cheap hosting plan elsewhere will be plenty fast for any small/medium-sized blog.
- Your SEO should not be negatively affected by the transition. Search engines actually tend to rank self-hosted blogs even higher.
- Your blog can be monetized and expanded after the transition.
Some bloggers like to use WordPress.com because of the large community of WordPress.com bloggers and this is a practical reason to go that route. I know that WordPress.com’s now-retired Daily Post community really helped my blog get going back in 2013. That was invaluable to me at the time. However, when you write, do you want an audience comprised of other bloggers? Maybe you do! (I certainly didn’t mind it!) But most people want casual internet browsers to find their blogs too. For this reason, a self-hosted blog is advantageous since SEO is much easier to control with the help of a few plug-ins.
If I have convinced you to migrate your WordPress.com blog to a self-hosted site, then let’s proceed with my Guide on How to Migrate Your Blog in 7 Days or LESS.
My Seven-Step Guide to Migrate a WordPress.com Blog to Self-Hosting
Day 1

Purchase new hosting. This is the first step since you will now need a new place to store your WordPress blog files. I recommend using Bluehost since they are the same hosting provider that I use for this blog. Their customer service is top-notch and they offer unlimited storage space which is huge! 🙂 (I would highly advise you AVOID HostGator- they provided horrible service for my other technology blog and I did NOT enjoy working with ASmallOrange when I used to host with them. Please learn from my mistakes haha.)

If you do not have a pre-existing domain purchased, you can also buy one from Bluehost. I already had one with GoDaddy which was mapped to my original WordPress.com blog.
Day 2
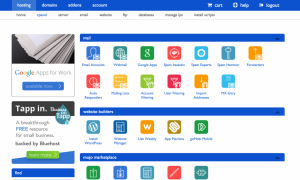
Day 2 is devoted to getting set up in Bluehost. Log in, and you will find yourself in Bluehost’s cPanel. If this looks complicated, don’t sweat it. You’ll rarely ever be on this page. Bluehost offers a one-click WordPress Install. I recommend you follow this process as it is very simple.
Once WordPress is installed, you will be able to rebuild your blog under a “temp URL” which is basically a temporary domain that only you have access to. Don’t worry, search engines will not see duplicate content during this time of transition. It won’t hurt your SEO.
Now it is time to move everything to Bluehost.
- Publish a post notifying your followers that you will be transitioning.
- On WordPress.com go to “Tools,” click on “Export” and download your blog.
- On WordPress.org, go to “Tools,” click on “Import” and import everything.
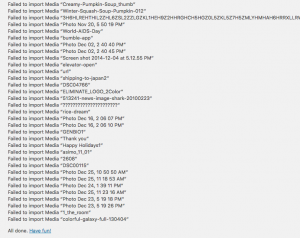
This process should be rather straightforward. If your blog is huge like mine was, it may take a while to import everything. (Be sure to check the box that asks if you want to import files.) My import attempts continuously kept timing out so I had to re-import the same four .xml files over 27 times over a period of several hours before all of my files would transfer. Don’t worry, this should NOT happen to you… Even Bluehost support said my experience was peculiar.
Day 3
Once all of your content has transferred, the next step is deciding how you want your blog to display. If you had a free wordpress.com theme, it may be available on wordpress.org too. If you paid for a premium theme, you may have to do some searching and pay for it again, unfortunately. There is always the option of starting with something fresh and new too!
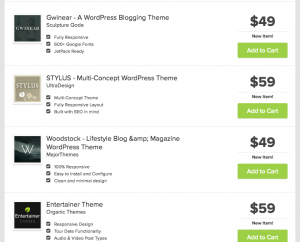
A standard theme should cost somewhere between $50 to $100. Once you have that file available, upload it into your Theme settings and begin customizing your blog’s overall appearance. You want everything to look appealing so take your time with this process.
Day 4
When you are ready for your site to go live, you need to do two things. First, make sure you update your domain’s nameservers. A nameserver basically tells the browser, “Hey, this website can be found over at wordpress.com!” and you want it to now say, “Actually, this blog can be found at Bluehost now!”
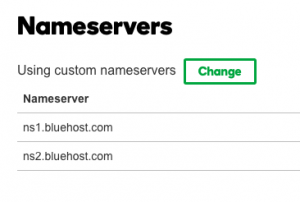
Updating nameservers is a painfully slow process, especially if you are anxious to get your self-hosted blog up and running. In fact, this process takes approximately 24-48 hours and no, there is nothing you can do to speed this up. However, you CAN use whatsmydns.net to check if your updated nameservers have propagated around the world yet.
I also recommend you contact Bluehost support directly and ask them for help changing your blog from the temp URL to the official domain. If you skip this, the domain will eventually update around the world and point at an inaccessible blog so you must make your blog go live too. You should do this step simultaneously or right after the nameserver update. Also, be careful with this- I recommend asking for help because if you go into the Settings and update the wrong URL field, you can accidentally change the spot that tells WordPress where your files are stored which basically temporarily breaks your blog. If this happens, you’ll have to call support regardless.
This was not learned from personal experience.
Day 5

On day 5, you wait. Your domain’s nameservers should still be updating around the world. If you’re lucky, this may finish sooner.
Day 6
After your nameservers have updated, you may find that your browser is still bringing you to your old wordpress.com blog. There are a number of things you should do. First, on wordpress.com, change your blog’s primary URL to the standard “.wordpress.com” if you previously used a custom domain. You won’t need this old blog anymore so you can even go into your settings and change it to private or mark that you don’t want search engines to index it. It is important to do SOMETHING at this point because duplicate content online can hurt your blog’s search engine optimization.
Depending on your browser, you may need to clear the cache and cookies in order to get your new website to display properly. One particular problem I encountered many times was my browser continuously kept trying to access “https://xyz.com” which was used when I had my blog hosted at wordpress.com. Because I now use shared hosting, my domain is strict “HTTP ://therockysafari(dot)com” and the prior link only leads to an error message.
(I’ve enabled a 301 Redirect to try to fix this. Waiting to see if it works.)
Update: Now in 2020, this issue is likely irrelevant. Most domain registrars provide a free SSL with your purchase and you will automatically use https anyway.
Day 7
Finally, it is time to migrate your subscribers. Install the Jetpack plugin on your new blog and connect it to your wordpress.com account. You can contact WordPress.com support and ask them to do this migration for you or you can go to Settings on your My Sites dashboard and click “migrate followers from another blog.” This process takes a few minutes.
The final step is to publish your “Hello, I’m Back!” post! 😀
And that’s it! You’ve successfully migrated your blog away from WordPress.com and over to a new self-hosted platform. Congratulations!
I hope you found this guide helpful! Let me know if I can help in any other way. I have gone through this before so definitely use me as a resource during your migration process. 🙂 Please leave a comment below letting me know how it turns out. Wishing you the best of luck.
I was planning to do the exact thing you did. This is going to be super helpful. Thanks!
I’m glad! Let me know if you need any help, David! 🙂